Installing a wood fence can transform your property, adding privacy, security, and curb appeal. Whether you’re looking to keep kids and pets safe or simply define your property line, a well-built fence is a valuable investment.
Wood fence installation involves setting posts in concrete, attaching rails between posts, and securing pickets or panels to create a barrier. The process typically takes 2-4 days for an average yard, costs $15-35 per linear foot, and requires basic carpentry skills. Proper post placement and concrete anchoring are critical for fence longevity.
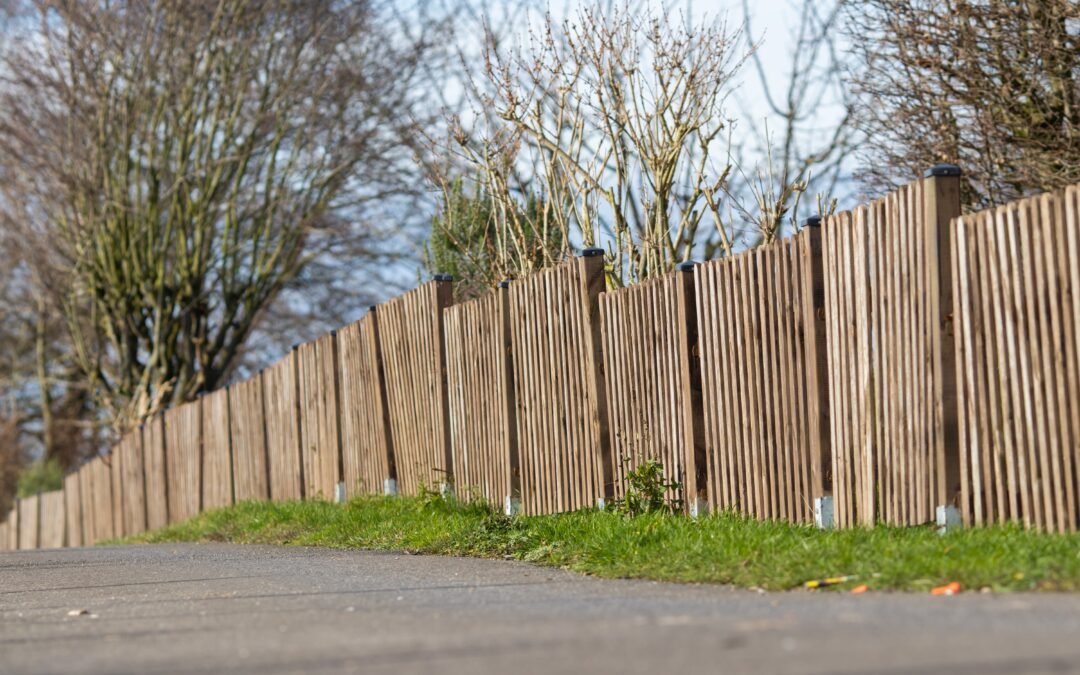
What Is Wood Fence Installation?
Wood fence installation is the process of constructing a permanent barrier using wooden posts, rails, and pickets. It starts with measuring your property line, obtaining permits, and marking post locations. You’ll dig holes, set posts in concrete, attach horizontal rails, and finally secure vertical boards or panels.
The complexity depends on your terrain, fence style, and local building codes. A simple 4-foot privacy fence on flat ground is beginner-friendly. A 6-foot fence on a slope? That requires more planning and skill.
Why Choose Wood Fencing for Your Property?
Wood remains the most popular fencing material for good reasons:
Affordability and versatility. Wood costs significantly less than vinyl or composite materials. A cedar privacy fence runs $20-28 per linear foot installed, compared to $35-45 for vinyl.
Natural aesthetic appeal. Wood blends beautifully with landscaping and complements any home style—from modern to traditional. You can stain, paint, or leave it to weather naturally.
DIY-friendly installation. Unlike metal or vinyl systems with proprietary brackets, wood fencing uses straightforward construction techniques. If you can use a drill and level, you can build a fence.
Customization options. Want a 5-foot fence instead of 6? Prefer wider picket spacing? Wood gives you complete creative control.
The downside? Wood requires more maintenance than synthetic materials. Expect to restain every 2-3 years and replace occasional damaged boards.
How Much Does Wood Fence Installation Cost?
Budget is usually the first question homeowners ask me. Here’s the realistic breakdown:
| Fence Type | DIY Cost Per Linear Foot | Professional Installation |
| Pine privacy fence (6 ft) | $12-18 | $22-30 |
| Cedar privacy fence (6 ft) | $15-22 | $25-35 |
| Picket fence (4 ft) | $8-15 | $18-26 |
| Split rail fence (3 rail) | $6-12 | $15-22 |
For a typical 150-foot backyard fence, you’re looking at:
- DIY materials: $1,800-3,300
- Professional installation: $3,300-5,250
Additional costs to factor in:
- Concrete: $5-8 per 80-pound bag (you’ll need 1-2 per post)
- Post hole digger rental: $40-70 per day
- Permits: $50-200 depending on your municipality
- Gate hardware: $30-150 per gate
Pro tip from experience: Always add 10-15% to your material budget. You’ll have waste from cutting, and it’s better to have extra boards than to make an emergency lumber run mid-project.
What Materials Do You Need for Wood Fence Installation?
Getting your materials list right saves trips to the hardware store. Here’s what you need for a standard 6-foot privacy fence:
Structural components:
- 4×4 posts (8 feet long for 6-foot fence height)
- 2×4 rails (horizontal support boards)
- 1×6 or 5/4×6 fence pickets
- 80-pound bags of fast-setting concrete
- Gravel for drainage (optional but recommended)
Hardware and fasteners:
- 3-inch galvanized or stainless deck screws
- 2.5-inch fence panel nails or screws
- Post caps (protect wood from water damage)
- Gate hinges and latch
Tools you’ll need:
- Post hole digger or power auger
- 4-foot level
- String line and stakes
- Circular saw or miter saw
- Drill with bits
- Measuring tape
- Wheelbarrow for mixing concrete
Wood species comparison:
Pressure-treated pine is the budget option ($12-18/linear foot) but weathers to gray and can warp. Cedar is my go-to recommendation ($15-22/linear foot)—it’s naturally rot-resistant, stays straighter, and ages beautifully. Redwood is premium ($20-30/linear foot) but offers the longest lifespan.
How to Install a Wood Fence: Step-by-Step Guide
Let me walk you through the installation process I’ve refined over years of building fences.
Step 1: Check Local Codes and Get Permits
Call your local building department before buying materials. Most cities require permits for fences over 4 feet tall and have specific setback requirements (usually 2-6 inches from property lines).
Also call 811 to mark underground utilities. This free service prevents you from hitting water, gas, or electrical lines.
Step 2: Mark Your Fence Line
Run a string line along your planned fence route. Use wooden stakes at corners and every 6-8 feet to mark post locations. Standard post spacing is 6-8 feet on center—closer spacing for heavy gates or high-wind areas.
Real-world tip: Walk your property line with your neighbor first. I’ve seen too many fence disputes that could have been avoided with a 5-minute conversation.
Step 3: Dig Post Holes
Dig holes that are:
- 10-12 inches in diameter
- 1/3 the total post length deep (24-30 inches for 8-foot posts)
- 6 inches below your frost line in cold climates
A manual post hole digger works but requires serious effort. Rent a one-person or two-person power auger for $40-70/day—totally worth it for more than 10 posts.
Step 4: Set Corner and End Posts First
Place 2-4 inches of gravel in each hole for drainage. Set your corner posts, checking for plumb (vertical) with a 4-foot level. Brace them with scrap wood in two directions.
Mix fast-setting concrete according to package directions and pour around posts. Recheck for plumb as concrete sets. Let cure for 24 hours before continuing.
Step 5: Set Line Posts
Run a string line between corner posts at the height your fence will sit. This ensures all posts are uniform height. Set remaining posts using the same concrete method, spacing them 6-8 feet apart.
Common mistake I see: Rushing this step. Taking time to get posts perfectly plumb and aligned saves hours of frustration when installing rails and pickets.
Step 6: Attach Horizontal Rails
Once concrete is fully cured (24-48 hours), attach 2×4 rails between posts. For a 6-foot fence, place one rail near the top, one near the bottom, and optionally a center rail for added strength.
Use 3-inch deck screws driven at angles (toe-screwing) or metal fence brackets for cleaner appearance. Pre-drill holes to prevent splitting.
Step 7: Install Fence Pickets
Starting at a corner or end post, attach your first picket perfectly vertical using a level. Use a spacer (I cut a piece of scrap wood to 1/2 inch) to maintain consistent gaps between boards.
Secure each picket with two screws per rail. Work your way down the fence line, checking every few boards with your level.
For professional results: Line up picket tops with a string line or chalk line rather than relying on board length—lumber isn’t always perfectly uniform.
Step 8: Install Gates and Add Finishing Touches
Install gate hinges and latches according to manufacturer instructions. Add post caps to protect wood end grain from water. Apply wood stain or sealant within 2-3 weeks of installation for best protection.
What Are the Most Common Wood Fence Installation Mistakes?
Let me save you from the errors I see repeatedly:
Skipping the gravel drainage layer. Water pooling at post bases causes premature rot. Always add 2-4 inches of gravel before setting posts.
Not digging deep enough. Shallow posts push out of the ground in freeze-thaw cycles or strong winds. Follow the one-third rule: bury one-third of total post length.
Using deck screws for everything. While screws work great for rails-to-posts, consider ring shank nails for pickets—they hold better against seasonal wood movement.
Ignoring wood grain direction. Install pickets with growth rings facing out (bark side facing you) to minimize cupping and warping.
Starting with line posts instead of corners. Always set corner and end posts first, then fill in between. This maintains straight lines and proper spacing.
How Long Does a Wood Fence Last?
With proper installation and maintenance, here’s what you can expect:
- Pressure-treated pine: 15-20 years
- Cedar: 20-25 years
- Redwood: 25-30+ years
The biggest factors affecting lifespan:
- Climate: Humid regions see faster decay than dry climates
- Maintenance: Regular sealing doubles fence life
- Post installation: Properly set posts outlast the fence boards
- Wood quality: Heartwood lasts longer than sapwood
Maintenance schedule I recommend:
- Year 1: Apply stain/sealer after 2-3 months (lets wood dry)
- Years 2-3: Reapply sealer
- Every 5-7 years: Replace any damaged pickets
- Every 10-15 years: Replace rails if needed (posts usually outlast rails)
Frequently Asked Questions About Wood Fence Installation
How long does it take to install a wood fence?
A 150-foot fence takes an experienced DIYer 3-4 full days: one day for post holes and setting posts, one day for posts to cure, one day for rails and pickets, and final day for gates and finishing. Professional crews finish the same fence in 1-2 days. Your first fence will take longer—budget 5-6 days to work safely without rushing.
Do I need to seal or stain my new wood fence immediately?
Wait 2-3 months before staining new pressure-treated wood. Fresh pressure-treated lumber contains moisture that prevents stain absorption. Let it dry and weather first. Cedar and redwood can be stained immediately if desired, but many homeowners let them age naturally to a silvery gray patina without any treatment.
What’s the best time of year to install a wood fence?
Late spring through early fall offers ideal conditions—dry weather for concrete curing and comfortable working temperatures. Avoid installation during winter in freezing climates (concrete won’t cure properly) or during rainy seasons when ground is muddy. In temperate regions, year-round installation is possible.
Can I install a wood fence on a slope?
Yes, using two methods: stepped (fence panels follow terrain in steps) or racked (fence panels angle with the slope). Stepped fences are easier for DIYers and work best on moderate slopes. Racked fences require more skill but create a smoother appearance. Very steep slopes may need professional help or terracing.
How do I prevent my wood fence from rotting?
Keep fence posts dry by using gravel at hole bottoms, applying post base sealant, and adding post caps. Maintain 2-3 inches clearance between fence bottom and ground to prevent soil contact. Apply quality water repellent sealer every 2-3 years. Trim vegetation away from fence to improve air circulation.
Should I use nails or screws for fence installation?
Use 3-inch deck screws for attaching rails to posts—they won’t pop out and allow disassembly for repairs. For pickets, ring shank nails or screws both work; nails are faster and grip wood movement better, while screws make board replacement easier. I prefer screws for rails and nails for pickets in most installations.
What’s the difference between a privacy fence and a picket fence installation?
Privacy fences use solid boards or panels (no gaps) standing 6-8 feet tall, requiring deeper post holes and heavier-duty construction. Picket fences use spaced boards 3-4 feet tall with decorative tops, need shallower posts (18-24 inches), and use lighter materials. Privacy fences cost more and take longer to install but provide complete screening.
Summary: Your Path to a Professional Wood Fence
Installing a wood fence is an achievable weekend project that adds immediate value to your home. The keys to success are proper post installation (dig deep, use concrete, check for plumb), taking time to align rails and pickets, and applying quality sealant for protection.
Whether you’re creating a private backyard oasis or adding curb appeal with a picket fence, following these proven techniques ensures your fence looks great and lasts for decades.